So that's it! This is the last door of this Advent calendar. Christmas is here! And we need something more than a cookie today!

I had my ambitions set very high for this last post; it had to be panettone; THE Italian Christmas bread. It's not an easy one, but hey, I thought, with my own personal bread baker at home, it shouldn't be a problem...but then the days went by and we didn't make panettone even once, until Sunday, when we decided we would give it a try, and started the preferment.

Stollen was my plan B, THE German Christmas bread or cake, that is. It was on my list of recipes for the blog but I had discarded it before because it is so similar to panettone (in some way).

We worked on the panettone in the late evenings of Monday and Tuesday, adding ingredients and foldings and taking good care of the dough. But, again, it's a complicated one!
So yesterday morning, before it went into the oven, I was sure it wouldn't turn out as it should.
It hadn't risen enough, I got nervous, and put another batch of raisins to soak in rum.
I would make Stollen, too, for if all else (i.e. the panettone) failed.

At this point, it had to be Quarkstollen (made with quark curd), as the original (yeasted) Hefestollen has to be left to rest for days before eating it. Quarkstollen is a quicker, easier version that doesn't keep for that long but otherwise is just as fine and full of wonderful ingredients.

I prepared the ingredients while the panettone was baking. And raising and raising in the oven! It didn't seem like such a failure in the end. But the Stollen was already started.


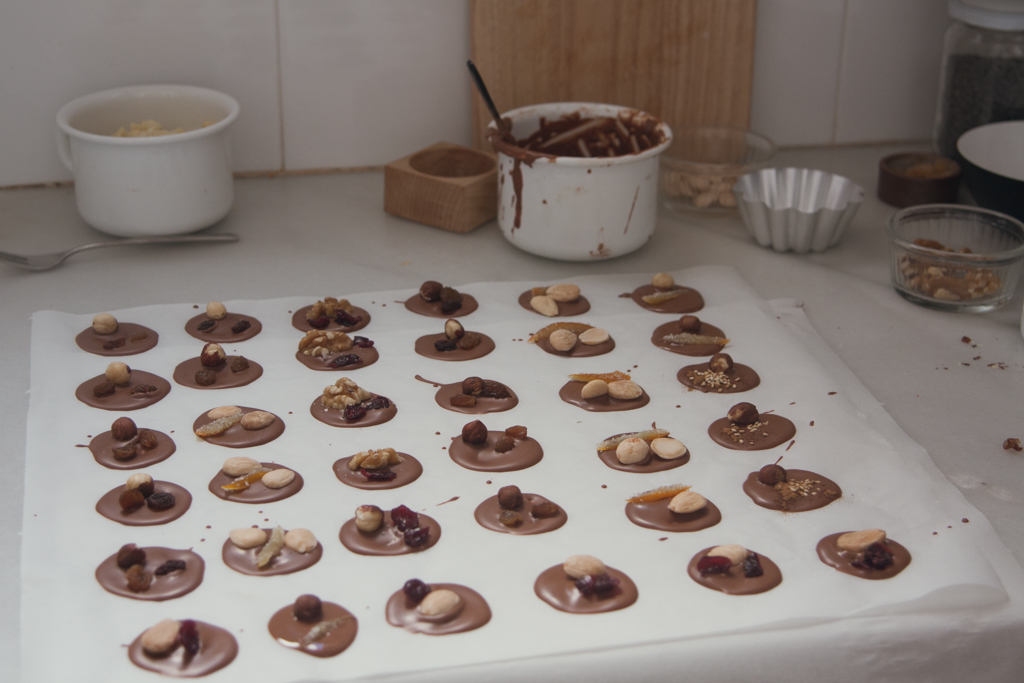
Long story short, I ended up with two recipes for today. Because the panettone turned out pretty fine! And so did the Stollen. And my house smelled so lovely for the entire day, enough to make all the effort worth it.

The recipe for the panettone comes from here (in Spanish), plus from some books and websites.
The Stollen is the one my mother makes every year, from a recipe she got from a box of oatmeal many years ago. I love how this recipe is explained, too, and when I compared them I noticed they were basically the same.

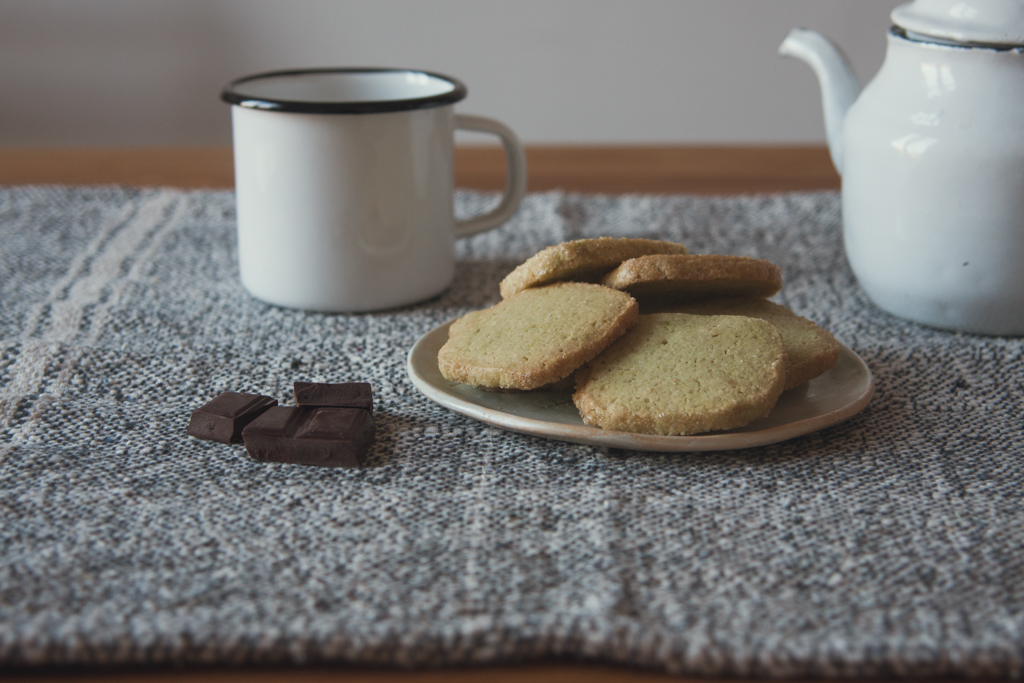
I'm giving you my recipe for Stollen today, considering it's the easier one, without being less festive or delicious. If any of you wanted to know more about the panettone, I will write that recipe down here too. But before that it needs some more work and experimenting.


Quarkstollen recipe (makes 4 little loaves or two bigger ones)

250 grams raisins
100 grams ground almonds or other nuts
70 grams candied citrus peels, chopped
rum for soaking
175 grams soft butter
250 grams quark
90 grams golden cane sugar
2 eggs
zest of 1 lemon
1 teaspoon vanilla extract
1 teaspoon almond extract
130 grams marzipan, chopped or torn into little pieces (optional)
400 grams flour
100 grams ground oats
1 package baking powder (15 grams)
1 teaspoon ground cardamom
0,5 teaspoons salt

about 150 grams melted or very soft butter and confectioner's sugar for topping


Leave the raisins and candied peels to soak in a bit of rum (better the night before).

Preheat your oven to 180º C. Line a baking sheet with parchment paper.

In a big bowl (I used the stand mixer), cream the butter, quark and sugar together. Add the eggs one at a time, the lemon zest and the vanilla and almond extracts.
Drain the raisins and peels and add them to the dough, then add the marzipan and mix.

Combine the flour, oats, baking powder, cardamom and salt. Add them to the dough bit by bit while you keep kneading with the dough hook of your mixer or your hands.

Divide the dough into 2 or 4 pieces and shape them into longish loaves.
Bake for 20 minutes. Take the Stollen out of the oven and brush their surfaces generously with butter. Bake for 15 more minutes and brush with butter again, then for another 15 minutes and repeat.
If they get to dark, cover them with foil.

The total baking time is 60-70 minutes, depending on your Stollen's size. Take them out of the oven and brush one last time with butter, then dust with confectioner's sugar and let cool completely.

Wrap them in aluminium foil, after giving them another dusting of confectioner's sugar.
They keep for at least two weeks.


************************

Epilogue and Christmas card

I'm really happy with the (very spontaneous) decision to make that pop-up blog idea come true.

I've eaten far too many cookies this month, but I've given away lots of them too, which was such a pleasure to do.
I've spent every free minute (mainly my little girl's nap times) baking and every evening editing photos, writing posts and recipes and going to bed too late.
I got much needed and appreciated help, in the kitchen and outside (THANK YOU!!!) and lovely feedback, and felt sometimes overwhelmed but mostly happy and fulfilled.
I had never had the excuse or occasion to be baking THAT much, and I can assure now that I still love it, even if I do it everyday.

And I know that I will back here for more. There's going to be some blog holidays now, resting and thinking and planning for the new year. And then I hope to see you here again.

Thank you so much for reading and commenting and baking along.

All the best, wonderful holidays to all of you, with time to think and listen and many happy moments.

Jana.


People! This is the second last cookie! I got a bit anxious when I realised that, and the decision for this cookie was a tough one to make: so many cookies I haven't baked and posted yet!

Two weeks ago I doubted if I would really find 24 really great cookies to talk about here, and now I suddenly have at least 10 more in mind.

So this recipe made the cut because it actually doubles as a last minute Christmas present. Almost any cookie is great as a present, but these are so festive and elegant and very christmasy, I think.


I went to buy all three chocolate colours, and decided I would raid my cupboards for the toppings.
And I decided I would temper the chocolate, because I wanted them to look shiny and beautiful.

The rest is composing the desired flavours and colours.

Some of my favourite combinations are
white chocolate/date/rose petals, 
milk chocolate/salted toasted almonds/candied orange peel, 
dark chocolate/toasted sesame seeds/salt flakes, 
dark chocolate/candied ginger/blanched almonds. 

Little seeds look wonderful too, candied peel and salt give lots of flavour, and don't be afraid of using toasted or fried salted nuts, the contrast with the chocolate is amazing...you'll have to find your favourites for yourself. It's fun!

And I can only recommend to candy your own citrus peel. It's not that much work really. And it smells and tastes awesome (instructions here and here).


Recipe (inspired by this and this. I started wanting to make orangettes to use my candied citrus peels. I started to browse for recipes and ended up with this idea instead)

200 grams dark (70%) chocolate
200 grams milk chocolate
200 grams white chocolate

toppings:
nuts: hazelnuts, almonds, walnuts etc., toasted or not
seeds: sesame, pumpkin etc., preferably toasted
dried fruits: raisins, cranberries, chopped dates, goji berries etc.
candied citrus peels and candied ginger, cut in small strips or pieces
dried rose petals
sea salt flakes
...

I'll explain how I proceeded, but there isn't any recipe, really.

If you want to temper your chocolate, look how it's done here, for example. It takes some time but the chocolate looks so perfect afterwards.

Prepare pieces of parchment paper to spoon the mendiants on. If you want you can draw circles the size you want your mendiants on one and place it under the paper you're using. It makes it easier to portion the chocolate.

Have your toppings ready as the chocolate solidifies quickly once spooned on the paper.

Begin tempering one kind of chocolate and when it's ready, spoon about 6 circles (mine are 4,5 cm) on your parchment paper. Decorate them with the desired toppings. I found six is a good measure to prevent the chocolate from solidifying before you top it.
Then move on to the next six. Once you've used all your chocolate, continue tempering the next one, and so one.

Store them carefully in an airtight container and try to resist the temptation to want to taste them all...(not easy!)


I like matcha in baking, a lot. And it turns out that recently, I like it for icing cookies too.
In these sablés, the green colour is not as impressive as it was on the gingerbread cookies, but the combination of flavours of the green tea, butter and almonds is just wonderful.
Their texture is shortbread-like and they have crunchy edges thanks to a sugar crust you obtain rolling the logs of cookie dough in coarse sugar before cutting it into cookies.

Wouldn't such an easy slice-and-bake cookie be the perfect thing to bake today, even if you still have to wrap all the presents?


Recipe (inspired by this one, and by the almond sablés in one of my favourite cafés; makes about 40 cookies))

200 grams soft butter
95 grams golden cane sugar
1 egg
200 grams flour
80 grams ground almonds
1 good pinch of salt
2 teaspoons matcha

some coarse sugar like demerara, for the cookie edges


In the bowl of a stand mixer or with a hand mixer, cream butter and sugar together until fluffy, then add the egg and mix again.
Combine the flour, almonds, salt and matcha and add to the other ingredients. Mix until combined. The dough will be quite soft. Divide it carefully into two equal parts and shape them into logs of about 4 cm diameter. If you want square cookies, flatten the sides of the logs pressing them between your kitchen counter and a cutting board.
Put the logs of dough in the fridge for at least two hours.

Preheat your oven to 180º C. Prepare a plate with coarse sugar to roll the logs in if you want crunchy cookie edges. Line two baking sheets with parchment paper.
Take the logs out of the fridge, roll them in the sugar and cut them into 0,75 cm thick slices. Place them on your baking sheets with some space in between them.
Bake for 12-15 minutes or until slightly golden around the edges.

Transfer the cookies on a wire rack and let cool down completely, before storing them in an airtight container.


Another Italian cookie is on the menu today...and it's not the last one (spoiler!).

Few days before the beginning of the Christmas feasts, I wanted a more simple cookie again, one that could almost count as a healthy (?) snack, one made with olive oil instead of butter (!!!).

I made these and they are what I was looking for, wholesome and not very sweet, while they still taste of Christmas and make your kitchen smell wonderful.

Tozzo means a piece of stale bread in Italian, but Tozzetti are traditional Roman cookies, baked twice and studded with hazelnuts. This version adds some cinnamon and cocoa for more flavour and colour.
I think they're lovely and like to eat them just like this. They're not hard as these kinds of cookies sometimes are. But they are still perfect to be dunked into your morning coffee/cup of tea/sweet wine after a Christmas meal...or you could dip them into chocolate for a more elegant, cookie platter version. I resisted the temptation, this time at least.


Recipe (adapted from this one. makes about 35 cookies)

2 medium sized eggs
80 grams golden cane sugar
60 ml olive oil
zest of half a lemon
235 grams flour (I used 135 wholegrain Kamut and 100 all-purpose)
0,5 tsp baking powder
2 tsp cocoa
2 tsp cinnamon
pinch of salt
100 grams hazelnuts, chopped in half


Preheat your oven to 180º C. Line a baking sheet with parchment paper.

In the bowl of a stand mixer or with a hand mixer, mix eggs and sugar until foamy, add the olive oil and lemon zest and continue mixing for a bit.

Combine the flour, baking powder, cocoa, cinnamon and salt and add them. Mix until combined, then add the hazelnuts. Divide the dough into three equal portions. With floured hands, shape them into 2,5 cm thick logs and place them on the baking sheet.

Bake for 20 minutes, until cracked on the sides but not browned.

Take out of the oven, let cool down until you can touch them and cut into 1 cm thick pieces with a very sharp, not serrated knife. Lay the cookies out on the baking sheet again and bake for another 8 minutes or until quite dry. They can still be a bit soft in the centre.

Let cool completely and store in an airtight container. They'll keep for at least two weeks.


Twenty down, four to go! Why don't we celebrate that Christmas is almost here with a cookie icing party? You really should join in, because making these cookies was so much fun.

When I decorated the first batch of cut-out cookies for the blog, with the help of my dear friend Julia, we came up with so many ideas that we decided there had to be a second round of these. 

The first time the cookies were white and we decorated them mainly with chocolate plus some colourful toppings.
This time I made a gingerbread dough for darker cookies, and we wanted to experiment with white and coloured icings. 


We used a base of confectioner's sugar and lemon juice, and added beet juice and matcha powder for pink and green hues. They worked a charm and the icing even tasted of beets/green tea (in a good way!). 

We only had a pastry brush and some makeshift piping bags (freezer bags with a cut-off tip) to decorate them, you could of course go a more professional way for more precise results. 
And you could mix different shades of the same colour varying the proportions of the sugar/colouring. 


The gingerbread dough has molasses and cocoa in it for a dark colour and flavour, and is nicely spiced. If you roll it out very thin you'll get crispier cookies, the thicker ones remain a bit chewy. I like both versions. 

I think that's it. Now start playing!


Recipe (dough adapted from this one. yield depends on the size of your cookies)

405 grams flour (I used 150 grams wholewheat and the rest all-purpose)
3/4 tsp baking soda
1 Tbsp cocoa
2 tsp ginger
2 tsp cinnamon
1/4 tsp nutmeg
1/4 tsp pepper
1/4 tsp cloves
1/2 tsp orange zest
1/2 tsp salt
195 grams soft butter
45 grams dark brown sugar (I used panela)
1 egg
140 grams molasses

for decoration:
confectioner's sugar
juice of 1 lemon
matcha powder
juice of a piece of grated beet
sprinkles, slivered almonds, chia seeds...(optional)


Mix the butter and sugar in a stand mixer until very light and fluffy. Add the egg and then the molasses and mix until combined. 
Combine the flour, baking soda, cocoa, spices and salt. Add the mixture to the wet ingredients bit by bit, mixing in between, until the dough comes together. 

Divide the dough in two equal pieces, shape them into disks and leave to rest in the freezer for at least an hour. 

Preheat your oven to 160º C fan. Line two baking sheets with parchment paper. 
Take your dough out of the fridge (one disk at a time) and roll it out on a floured surface. Quickly cut out your cookies, place them on the baking sheets and bake for about 10 minutes, rotating the sheets once. The cookies should barely change their colour. 
Let cool on a rack and decorate as desired. 

For the icing, mix confectioner's sugar with drops of lemon juice until you reach the desired texture. For the green icing, just add some matcha powder to this mix. For the pink one, use beet juice instead of the lemon juice. 


Checkerboard Cookies are called Schwarz-Weiss-Gebäck in Germany. They're the same thing, basically butter cookies with some cocoa and a really fancy look.
I have always admired them, but never made them. Until today. And, they're actually not that tricky to make! Plus, they look impressive and taste so good; like a cookie for kids, like a Marmorkuchen or the Italian Abbracci cookies.
Get yourself a glass of milk to dunk them in for the nostalgic cookie voyage!

However, you never fail with the classic combination of chocolate and vanilla, and I find them simply beautiful.
To make them, all you need is a bit of patience, a big knife and a ruler.


Recipe (adapted from this one. makes about 40 cookies)

125 grams soft butter
95 grams golden cane sugar
210 grams flour
1 teaspoon baking powder
a pinch of salt
seeds of half a vanilla bean
1 egg
15 grams cocoa

Mix butter, sugar and vanilla for some minutes, until light and fluffy. Add the egg and mix until smooth.
Combine the flour, baking powder and salt and add to the dough little by little. Mix until combined.

Take 250 grams of dough and add the cocoa, kneading with your hands until combined. If it gets too dry, add some drops of milk or water.

Shape the dough into two disks, wrap them in clingfilm and leave to rest in the fridge for at least an hour.

Roll out the two portions of dough separately into rectangles, each inside a freezer or ziploc bag (that makes it easier to actually get at least two straight sides). They should be 1 cm thick and 4 cm (vanilla dough) / 5 cm (cocoa dough) wide (I ended up making two of each). Then cut them lengthwise in 1cm wide strips.

Next assemble your checkerboard: one vanilla strip between two cocoa strips in the first row, then two vanilla one cocoa, and the third row like the first one. Wrap it in clingfilm and press the sides slightly against a flat surface to adjust the shape. Leave to rest in the fridge for half an hour.

Preheat your oven to 160º C fan. Line two baking sheets with parchment paper and cut your dough into 5 mm slices. Place them on the sheets and bake for 15 minutes, rotating them once. They should be only slightly darker than before baking.

Leave to cool on a cookie rack and store in an airtight container for up to two weeks.


These are the tiniest cookies on this blog so far. For when you want something sweet with your coffee/tea/sweet wine, but only one bite full. Or to fill up the gaps on your Christmas cookie platter maybe?

I wanted to make something with pistachios, and not much more. Like Sicilian paste di mandorla; only egg whites, nuts and sugar. No flour, no butter. I added a bit of salt and citrus zest, and that's it.


Anyway, these are precious little gems. I mixed pistachios and almonds but you could make them all pistachio, of course. They will turn out even more green and pretty. But don't worry, they will have a great pistachio flavour either way.
I topped them with chocolate because I like to top almost everything with chocolate. It goes really well with the pistachios, but you could omit it.


Recipe (adapted from this one, makes about 30 cookies)

80 grams pistachios
80 grams almonds (or substitute with more pistachios)
80 grams golden cane sugar
1 Tablespoon mild honey
1 egg white
1 teaspoon of lemon or orange juice
zest of half an orange
zest of half a lemon
a pinch of salt
30 grams dark chocolate and some chopped pistachios for decoration (optional)


Preheat your oven to 170º C fan.

Blitz pistachios and almonds (I left them a bit coarse).
Mix them with the sugar, honey, salt and zest.

Add the juice and then the egg white. Don't add all of it at once, proceed bit by bit, stirring the mixture. I only needed half of it. You have to be able to shape your dough into balls, so it shouldn't be too sticky.
Form little balls with your hands, mine were somewhere between a marble and a walnut.

Place them on a lined baking sheet and bake for 10-15 minutes, until firm and slightly golden.

Let cool on a rack.
Melt the chocolate in a bowl over a saucepan of hot water. Spoon some of it on every cookie and top with chopped pistachios.

Let dry and store in an airtight container for up to a week.